DDNS-GO Usage Guide
What is DDNS
DDNS (Dynamic DNS) automatically updates a fixed domain name with a device's changing public IP address.
Benefits:
- You don't need to remember the current public IP
- The domain stays valid after network reconnections or IP changes
- Easier for remote access to devices on home or mobile networks
For BliKVM, the main value of DDNS is:
Always reach your device using a fixed domain name instead of looking up its current public IP.
Current solution
BliKVM currently uses DDNS-GO as the DDNS management tool.
On the UI you'll see:
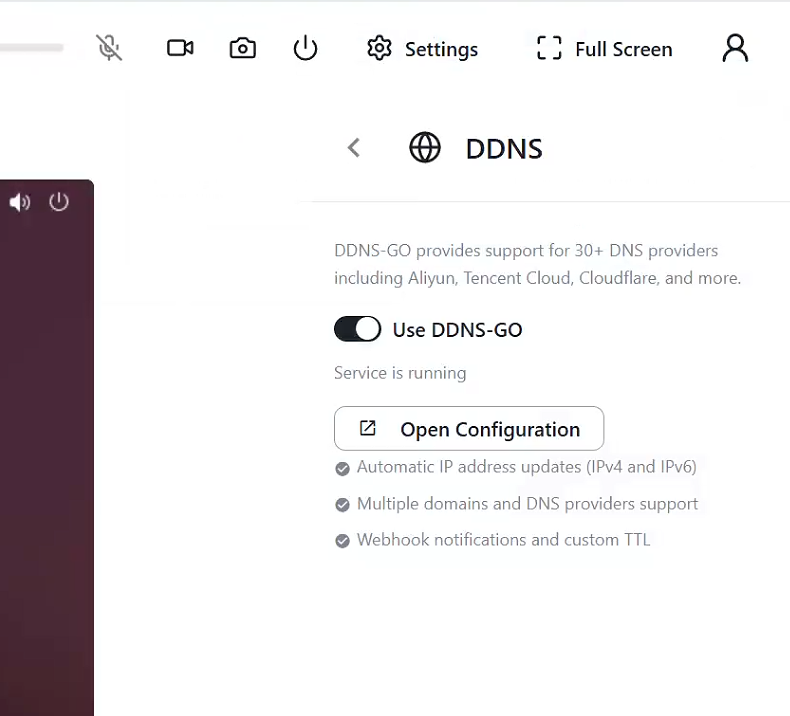
Use DDNS-GO- service status indicator
Open Configuration
Enable DDNS-GO in BliKVM and open the DDNS-GO configuration page to complete your domain setup.
Why public IPv6 + DDNS is a good fit for BliKVM
Many devices lack a public IPv4 but are assigned public IPv6 by ISPs.
In that case, public IPv6 + DDNS is an excellent remote access solution for BliKVM.
Typical scenario
Assume your BliKVM device:
- is on a home network
- has no public IPv4
- has a public IPv6 that may change
Without DDNS you would need to:
- Check the device's current public IPv6
- Manually enter the long IPv6 address in your browser
IPv6 addresses are long, hard to remember, and become invalid after changes.
With DDNS-GO:
- Assign a domain to the device, for example:
kvm.example.com
-
DDNS-GO updates that domain to the device's current public IPv6
-
From then on visit:
https://kvm.example.com
As long as DDNS-GO runs, the domain will point to the new address after IP changes.
When to use
Enable DDNS-GO when:
- Your home broadband provides a public IPv6
- You want a stable domain to access BliKVM
Steps
1. Open the DDNS page
Navigate:
Settings -> Remote Access -> DDNS
2. Enable DDNS-GO
Toggle:
Use DDNS-GO
The page shows the service status after enabling.
3. Open the configuration UI
When the service is running, click:
Open Configuration
This opens the native DDNS-GO configuration page.
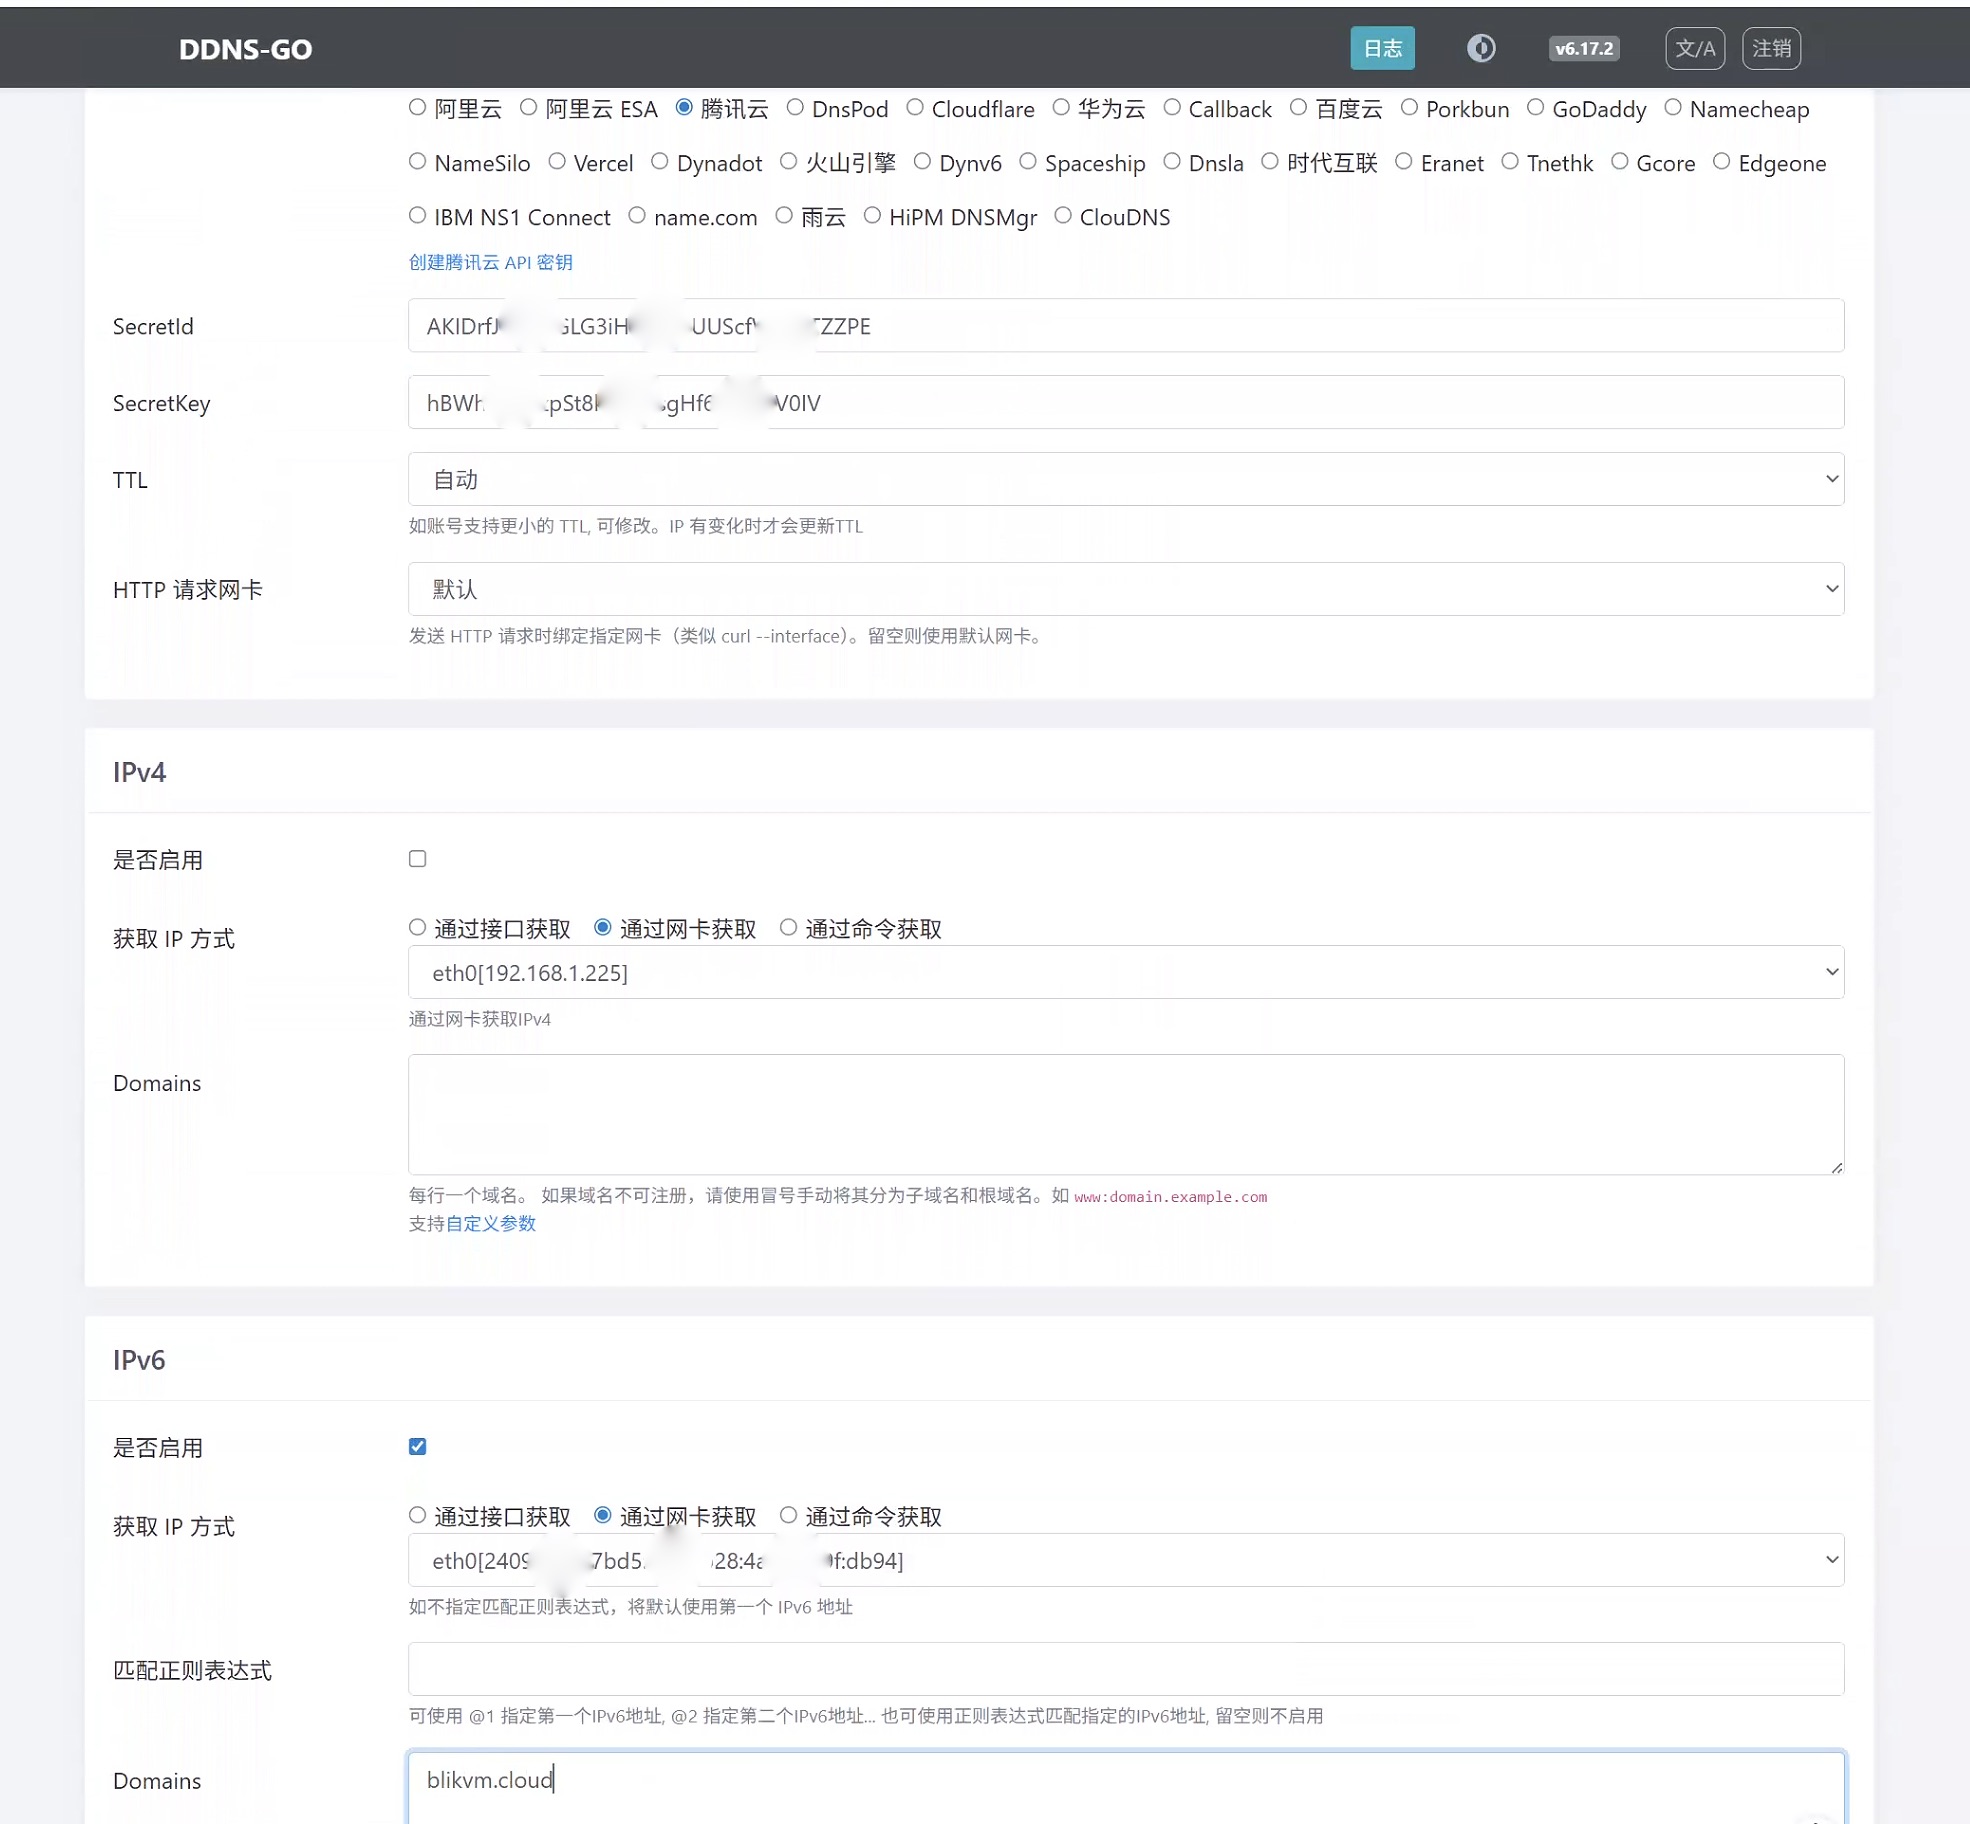
4. Configure your DNS provider in DDNS-GO
Enter provider-specific information, for example:
- domain
- subdomain/host record
- access key / token
- record type
5. Access BliKVM via the domain
After a successful setup you can reach BliKVM using your domain instead of the raw IP.
Example
- Device uses a non-static public IPv6
- Example domain:
blikvm.cloud - The example API used in tests is Tencent Cloud's free API (requires a personal Tencent Cloud account)
Configure DDNS-GO similar to:
After configuration, open the logs after a few seconds to see success:

Then simply visit:
https://blikvm.cloud
Will settings be lost after an upgrade?
No.
DDNS-GO saves its configuration in the device data directory. Normal upgrades retain the configuration and enabled state, so reconfiguration is generally not needed after upgrades.
Common checks
If the domain does not work, check:
1. Service enabled
Confirm Use DDNS-GO is turned on in the BliKVM UI.
2. Service running
The UI should show the service status and display Open Configuration.
3. DNS record updated
Query your domain to verify it resolves to the current public IPv6.
4. IPv6 connectivity from the client
Even if the device has a public IPv6, the client network must also support IPv6 to connect.
Recommendation
If your BliKVM's network supports public IPv6, prefer:
Public IPv6 + DDNS-GO + fixed domain
It is simple, reliable, and suited for long-term remote access — ideal for home management and remote device access when no public IPv4 is available.